
Six steps to a print
Every picture below is the actual store, photographed on one real activity file in a single sitting. Nothing is a mock-up, and the numbers on the poster are the numbers that were in the file — except the time, which the file did not carry and which was typed in, exactly as a customer would.
-
The shape of it
Six steps and a sheet.
The decisions live in a single column on the left, one open at a time, so you are never looking at forty controls at once. The sheet sits beside them and redraws on every choice — it is the same drawing that goes to press, not a preview of it.
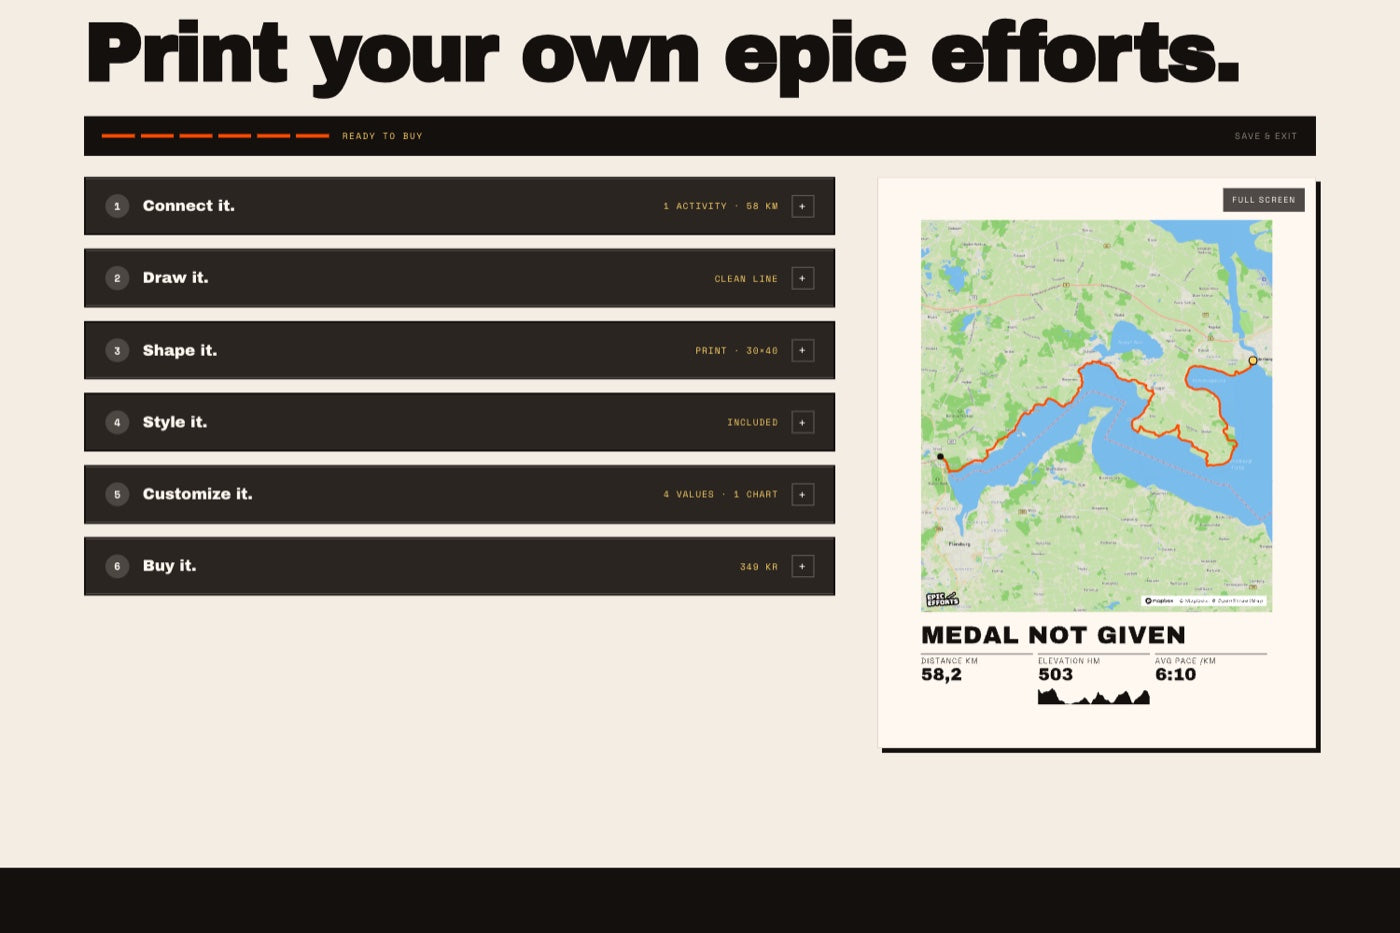
All six steps closed. The poster updates on every choice you make. -
1 / 6
Connect it.
Two ways in. Connect a Strava account once and pick from a list, or drag a file straight in — GPX, TCX or FIT, from any watch or phone. Drop several and you unlock the motifs that draw more than one.
The privacy radius sits here, with your data, rather than down among the colours. It is not a question about how the poster looks; it is a question about how much of your address leaves your machine. The default clips the first and last 500 metres, you can push it to two kilometres, and it never goes to zero.
Your file is read in the browser. The untrimmed version — the one that starts at your front door — is never something we receive.
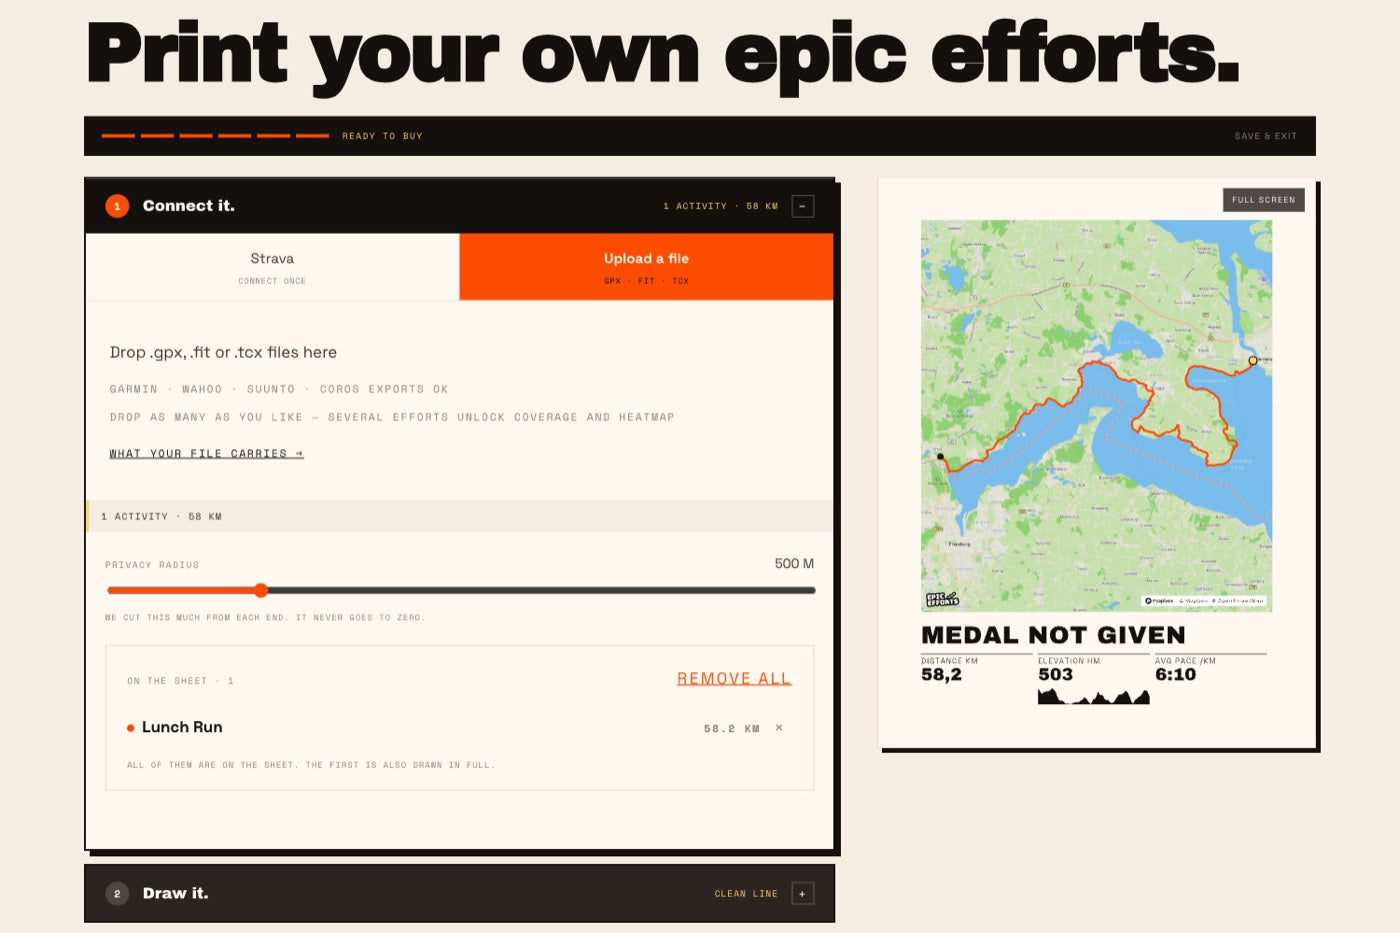
Step one open: the two doors, the privacy slider at 500 m, and the activity on the sheet. -
2 / 6
Draw it.
Eleven motifs. Five are drawn from the routes you brought: Clean line, Track + elevation, Heatmap, Coverage and Multisport. The other six are Data prints, drawn from a whole Strava account rather than one outing, so they wait until there is an account to draw from.
A motif that cannot work with what you have is switched off with the reason written on it, and a way forward where there is one. A button that simply does nothing is a puzzle you should not have to solve.
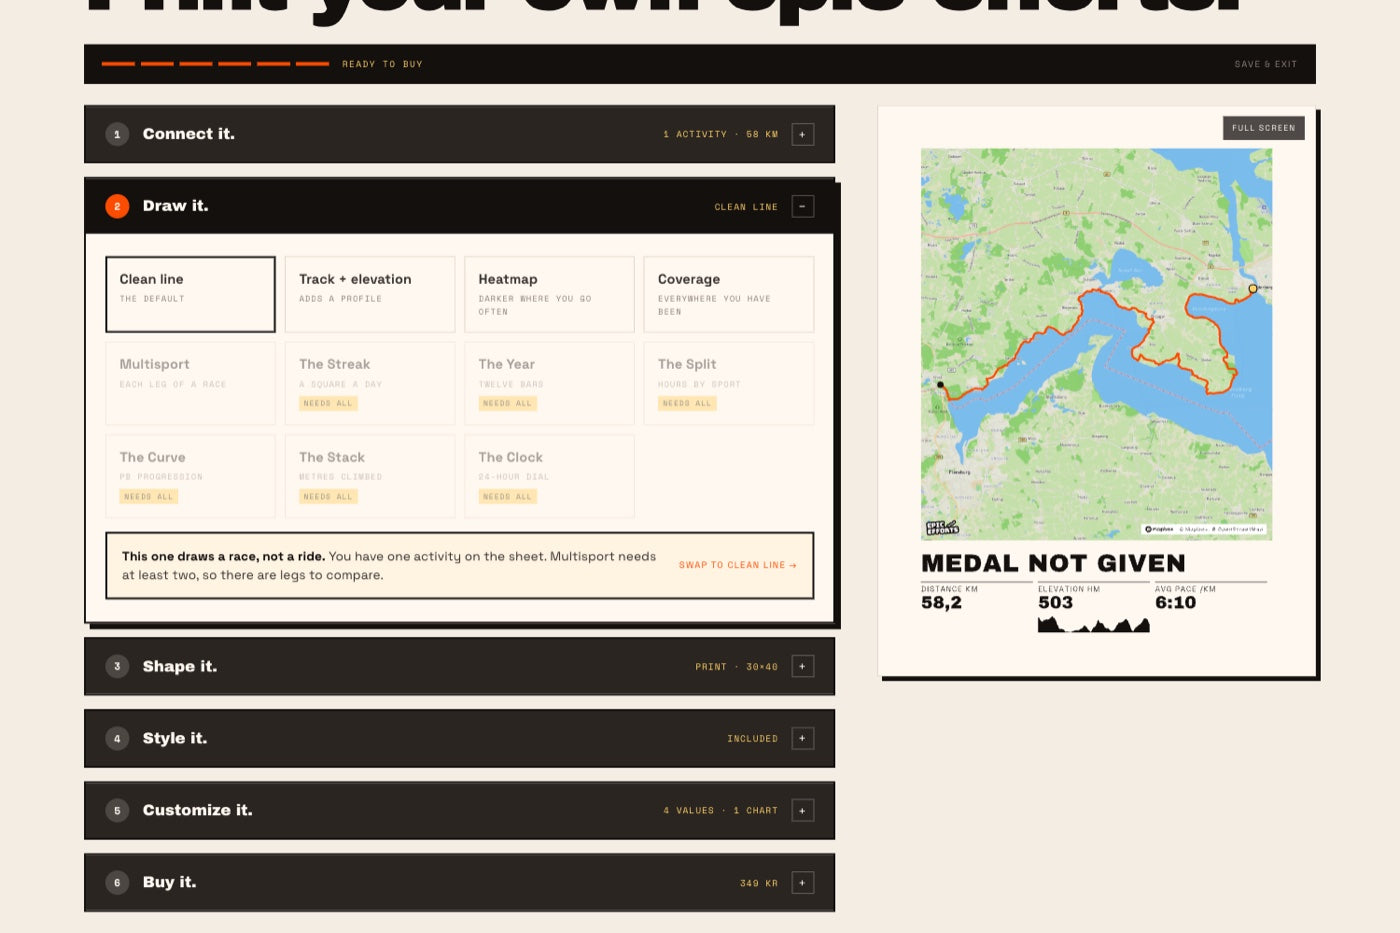
Eleven motifs. The seven greyed ones say what they need and offer a way on. -
3 / 6
Shape it.
The object first, then the size, then the paper. A loose print and a framed one are two different things to make, and they are priced accordingly — from 349 kr and from 799 kr. Sizes are 30×40, 50×70 and 70×100. The six Data prints are the exception: each is its own product at one fixed size, because the motif decides the sheet — The Clock is square at 50×50 and The Curve is 30×40.
Two papers, on framed and loose alike: Museum 250 gsm, an uncoated offwhite archival matte, and Classic 170 gsm, uncoated matte and lighter in the hand. A loose 70×100 is the one exception — it comes in 250 only, because the sheet bends at that size. Framed prints arrive assembled, behind glazing, with the hanging hardware already on. Loose ones arrive rolled in a tube.
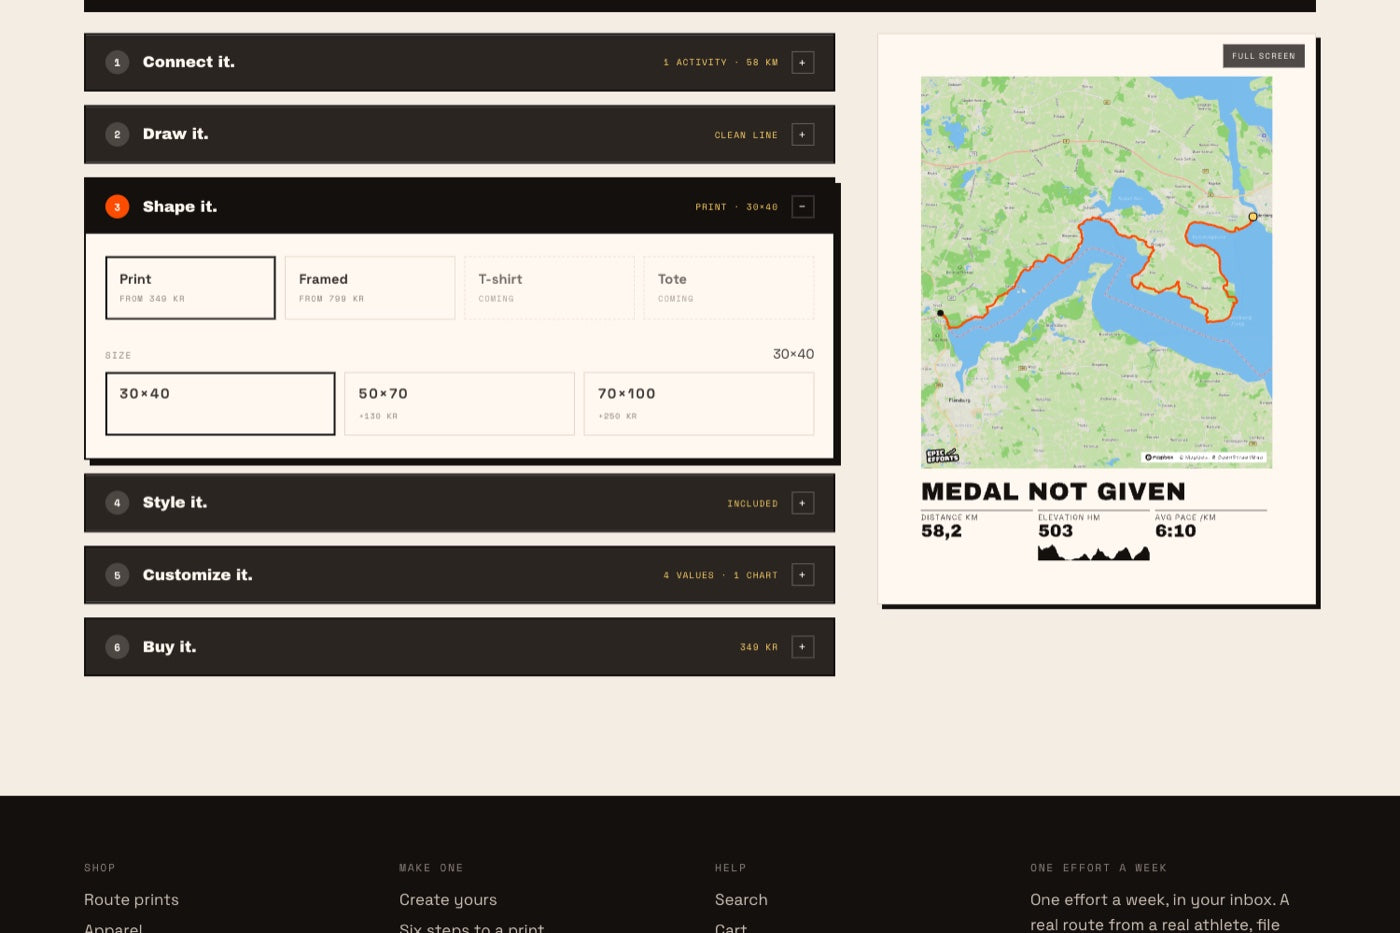
Object and size. Two are on sale; apparel is not finished yet, and says so. -
4 / 6
Style it.
Colourway, background, line colour and line weight. Four colourways, and what they change is the ink, not the paper — the sheet you chose in step three is the sheet you get. Bare paper prints the route and the numbers and nothing else, so the paper is what sits between them. Natural, Night, Signature and Ember flood the whole sheet, and the ink covers the paper's own colour. On screen a flooded Natural and bare paper look the same; the screen cannot show that difference, because the difference is ink. There is no such thing as black poster stock in this quality.
Line weight is set in millimetres rather than pixels, so a medium line looks the same on a 30×40 as on a 70×100.
Eight backgrounds: the bare line and seven maps. Light, Paper and Ink are the same map tiles treated three different ways, so the seven come off four base maps rather than seven. Where a map is used, the print carries the credit for it — that is a licence condition, and it is printed, not implied.
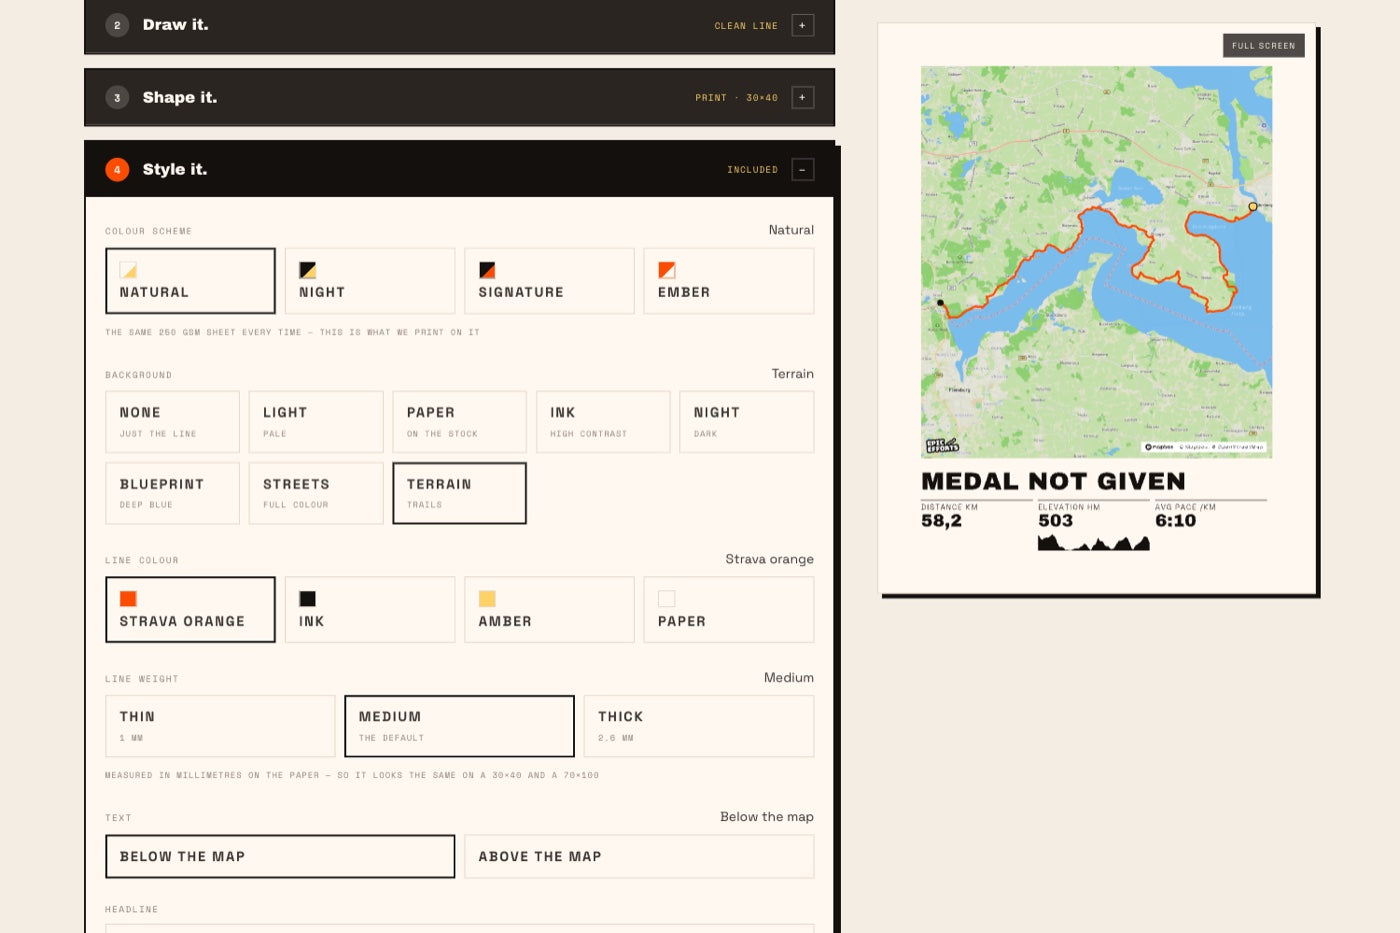
Colourway, eight backgrounds, line colour and weight — with terrain selected. -
4 / 6
…and the words.
The headline prints bottom-left, where a race name would go. It starts as Medal Not Given and most people leave it there. Three suggestions sit under the field if you want a different one.
Framing is how much air sits around the route, from tight to panorama. The map follows it, so this is the zoom as well as the crop.
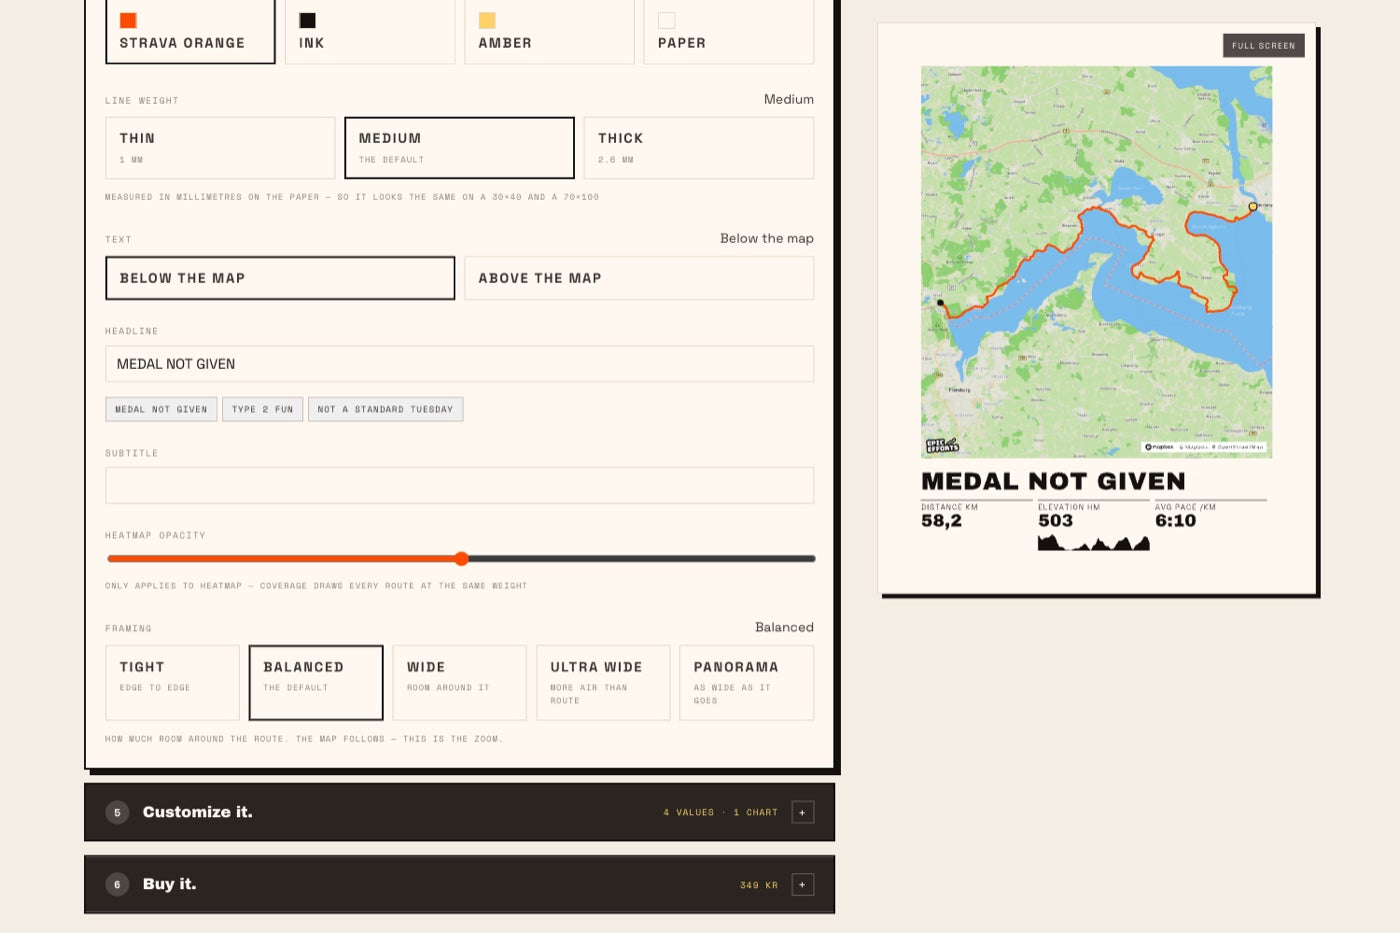
Headline, subtitle and the five framings. This is the zoom control. -
5 / 6
Customize it.
Nineteen numbers exist; four go on the sheet. Which four you may choose from is decided by your file, not by us — everything it does not carry is greyed out and says not in this file. On the run pictured here that is fifteen of the nineteen, because it is a route someone published rather than an effort someone recorded.
The field at the bottom appears only because that file has no time in it. Type your own and elapsed time and pace open up, in your sport's own unit. Moving time stays empty, because nobody can know that from a route.
The labels are yours to rename. The values are not — they come from the file, and a number you typed can never push a measured one aside.
What your file carries maps out which sources give which numbers. What the numbers mean goes through all nineteen and every chart — what each one measures, and why it is drawn the way it is.
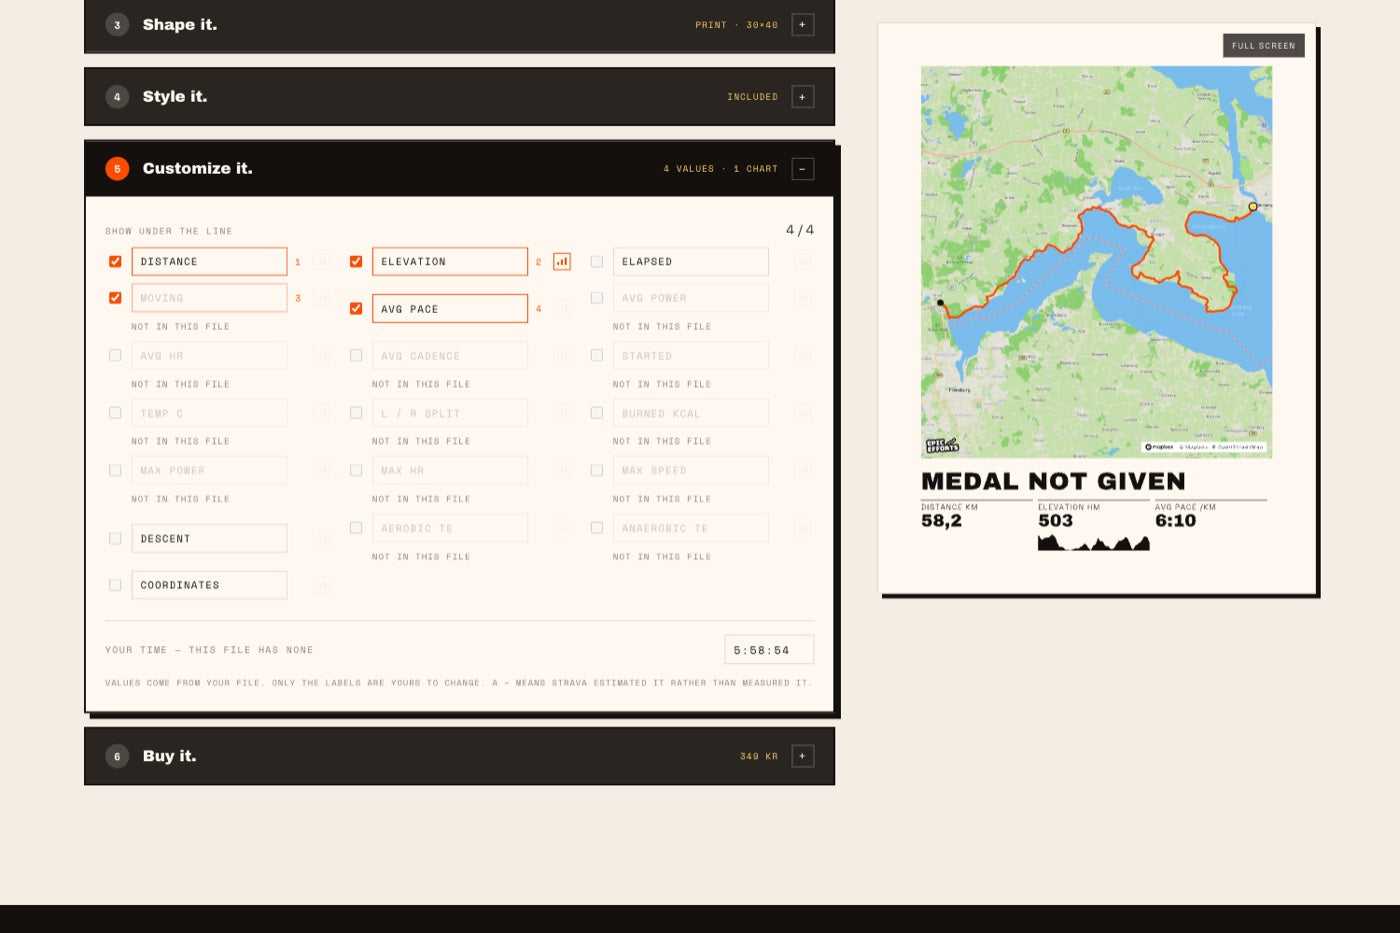
Fifteen fields closed, four chosen, and the time field the file itself opened. -
6 / 6
Buy it.
The bill shows what costs something and what does not. On this poster everything after the base price is included, and the line at the bottom is the item that goes in the basket.
Nothing goes to press on its own. Every order waits for a person to release it, and until then you can cancel it yourself and be refunded in full.
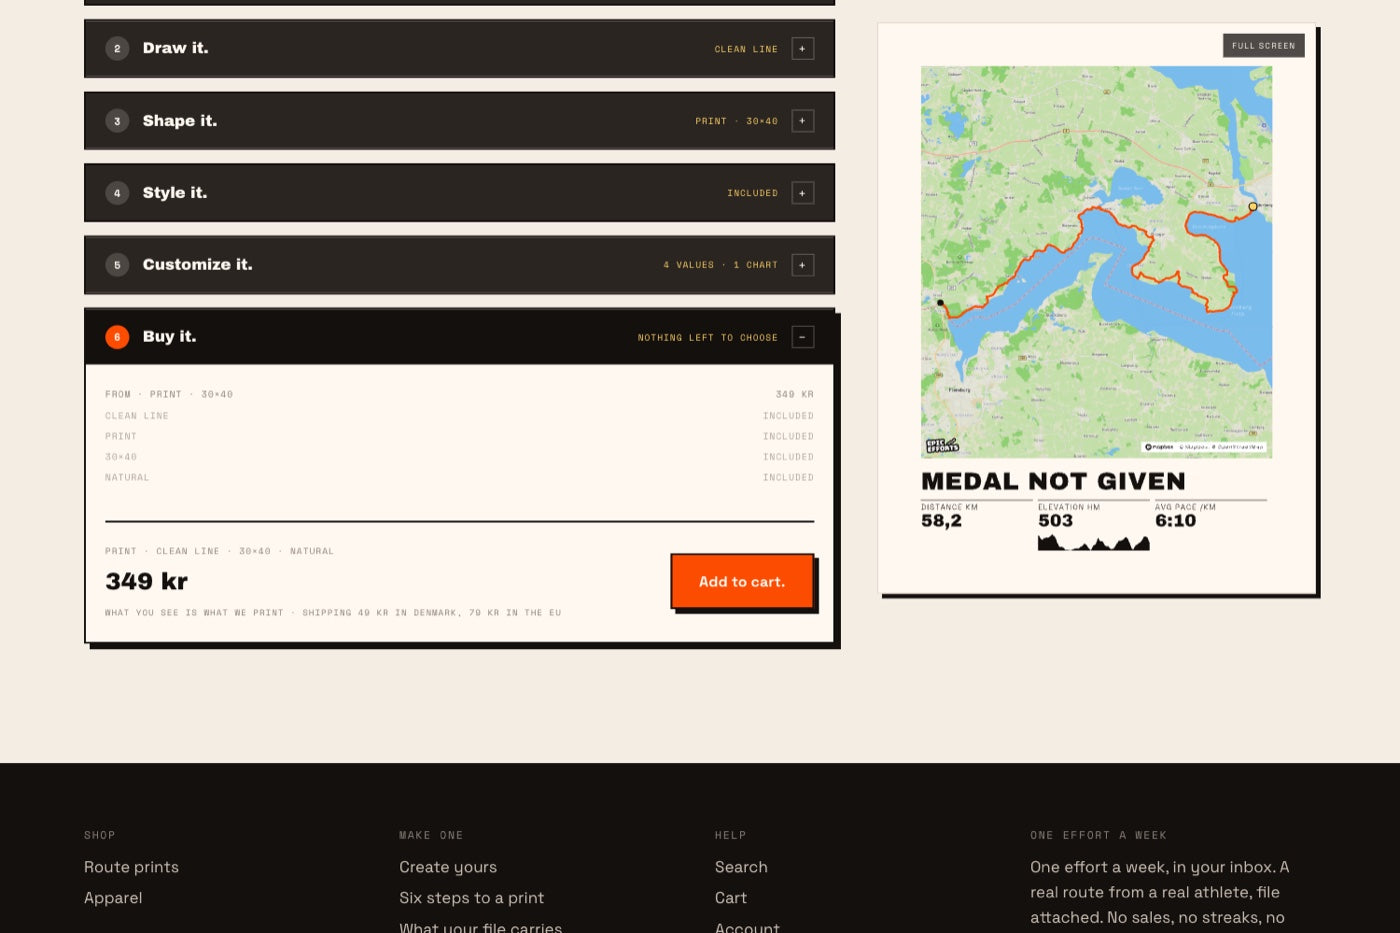
The bill, the price, and one button. -
+
See it full screen.
Available from every step. It is the same drawing enlarged, not a second image — what you approve is what we print.
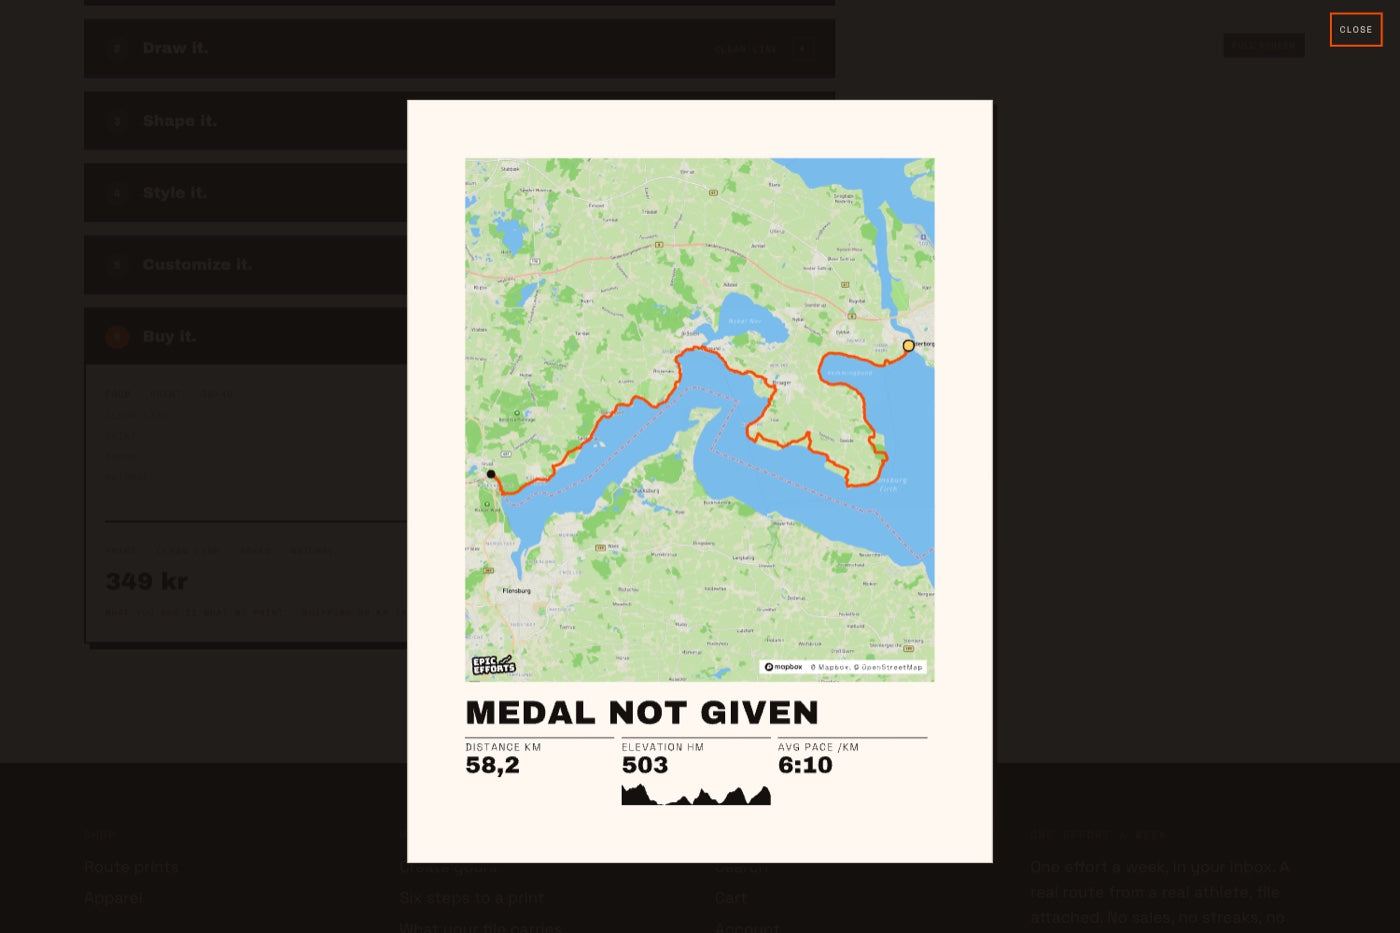
58.2 km · 503 metres of climb · 6:10 per kilometre. Mapbox and OpenStreetMap credited on the print itself.
What you see is what we print
No surprises between the screen and the wall.